
Soap With Essential Oils Recipe: You can start making aromatherapy soap bars by choosing a gentle base and keeping the essential oil concentration to about 2%.
Then warm the base slowly and blend in lavender or citrus for a relaxing scent.
You’ll need a thermometer, molds, and logs to track each batch.
Ready to test your first blend and see how it works for you?
Choosing Essential Oils for Relaxation and Skincare

Choosing essential oils for relaxation and skincare is about selecting scents that match your mood and skin needs. You’ll explore profiles like lavender for calm, citrus for energy, and peppermint to refresh, then decide what fits your skin type. Consider their therapeutic properties, such as soothing anxious thoughts or fighting blemishes, so your soap feels comforting yet practical. Start with small blends, a few drops per ounce, and test on your wrist. Keep notes on scents you love and any skin reactions, then adjust blends. Have fun, share tips with friends, and keep learning together every day. A well-chosen dilution ratio ensures both safety and effectiveness in your aromatherapy soap.
Safety and Dilution Basics for Essential-Oil Soap
Begin with safe dilution ratios, such as one drop per teaspoon of soap base for mild skin. If someone has sensitive skin, perform a small patch test first and use lower concentrations for safety. Keep notes on what works, and pair the oil with a gentle base to keep baths enjoyable. For best results, use vegetable glycerin base as it supports skin hydration and is often free from irritants like SLS and parabens.
Safe Dilution Ratios
Safe dilution ratios keep your soap effective and skin-friendly, so start with a careful plan. You’ll master dilution calculations by keeping a simple formula in your kitchen. Start with small batches and log every drop. Know dermal limits and choose safe concentrations for skin. A basic rule is to stay under 2 percent for most blends. For sensitive folks, aim under 1 percent and test a small area. Dilution calculations help you compare batches and adjust safely. Once you know dermal limits, you plan with patience. Remember safety data and keep a logbook for reference. Always ensure your colorants are cosmetic-grade mica to maintain skin safety and compliance with topical product standards.
Skin Sensitivity Tips
When you mix essential oils, skin safety comes first, especially if you have sensitive skin. Start with patch tests on your forearm for 24 hours and note any redness or itching. Use small amounts and always dilute in a plain soap base, then wash and recheck. Be mindful of allergy awareness, especially for citrus or cinnamon scents that can irritate beginners. If you feel stinging, rinse off and skip that oil. Label blends, store away from children, and log any reactions. With patience, you’ll enjoy calming scents and safer, more confident soap making. Share tips with friends too.
Cold-Process Soap: Understanding the Aroma-Preserving Method
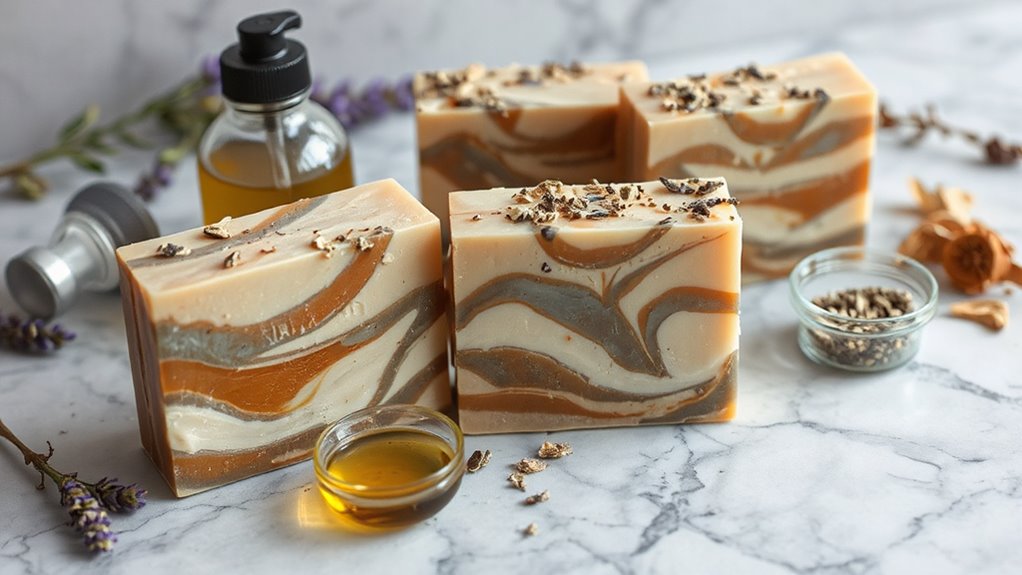
Cold-process soap preserves aroma without heating, which matters for essential oils. You learn the saponification process, how lye and oils meet, and how the mixture transforms into soap with careful heat control. In cold process, the aroma stays vivid because essential oils integrate during the chemical reactions, not afterward. You can tailor blends, like lavender and lemon, by adding oils at the right moment to keep the scent strong. This hobby feels safe when you measure carefully, wear gloves, and do a skin patch test before use. Start small, practice patience, and enjoy the creamy blend as fragrances bloom in the bars.
Step-By-Step Beginner Soap With Essential Oils Recipe
First, gather ingredients and tools such as soap base, essential oils, measuring cups, and a sturdy bowl. Next, melt the soap base and blend in your chosen essential oils, then pour the mixture into molds and let it set. Keep safety in mind, work calmly, and you’ll see how easy it is to create your own scented bars.
Gather Ingredients And Tools
Let’s gather your ingredients and tools so you’re ready to start making soap today. You’ll need a simple soap base, a sturdy bowl, a spoon, a digital scale, and measuring cups, plus gloves and goggles for safety. Check your oil sourcing options, like coconut oil, olive oil, and shea butter, and pick essential oils that match your mood. Keep scent layering in mind, starting with a gentle base scent and a brighter top note. Gather a small notebook to jot blends, labels, and trials, and have a soap mold ready to go. Have fun experimenting and stay curious and confident.
Melt Blend Pour
When you start Melt Blend Pour, you’ll see easy, warm soap magic come together. Heat your base gently, stir until smooth, then add fragrance without rushing, because temperature control matters. Pour slowly into molds, watch the mix settle, and you’ll notice scent retention holds strong as it cools. Keep notes on temperatures and timing so future batches are easier. If bubbles appear, tap the mold lightly and let them escape. This process feels like a fun project you can finish in an afternoon with friends, turning simple ingredients into relaxing, skin-loving bars ready for sharing with neighbors.
Creating Sleep-Enhancing and Stress-Relief Blends

To create sleep-enhancing blends, start with soothing oils like lavender and chamomile to promote calm. Mix a touch of lavender with chamomile to set the mood, then add a hint of vanilla or cedar for warmth. You’ll notice synergy as the scents mingle, guiding your brain toward rest. Keep layering simple: one base note, one middle note, and one top note so the aroma stays comfy. Make small batches, test on skin, and label blends for easy reuse. This hobby stays fun, doable, and relaxing, perfect before bedtime. Share tips with friends and celebrate small wins together today.
Troubleshooting Common Essential-Oil Soap Issues
After experimenting with sleep blends, you might hit a snag when making soap. If blobs form, it could be ricing or sudden discoloration, which can feel frustrating but is fixable. Keep your temperature steady, stir slowly, and add lye-water gradually to prevent shock to the mix. If color shifts, switch to a smaller fragrance amount and test in a small batch first. Soap should trace and firm up as you move to the mold, then cure patiently. These tips help you enjoy crafting, even when little glitches pop up.
Aromatherapy Benefits: Lavender, Tea Tree, and Peppermint in Soap

Lavender, tea tree, and peppermint oils bring real mood boosters and skin benefits to your soap. You can blend these scents to create oil synergy, keeping the bars balanced and pleasant. Lavender calms the nerves, tea tree supports clear skin, and peppermint adds a light zing that wakes the senses. Try scent layering by using a gentle lavender base with a peppermint top note for sparkle. Use small amounts at first, test on skin, and adjust gradually. This hobby stays simple, affordable, and rewarding, so you can enjoy creating valuable bath bars with friends or solo, and your confidence can grow daily.
Storage, Curing, and Long-Lasting Scent in DIY Soap
Storing your freshly made bars properly helps their scent stay bright for months. Keep bars in a dry, cool place away from sunlight, heat, and humidity.
During curing, allow air to circulate around the bars to improve scent retention and bar longevity. Let them cure fully for two to four weeks before wrapping, so textures settle.
Wrap in breathable paper or cotton, then store in a labeled container for easy use. Test a small bar after two weeks to check scent strength and texture.
With these simple steps, you can enjoy your hobby and fresh aromas every day. Have fun experimenting with scents.
Frequently Asked Questions
Are There Allergy-Safe Substitutes for Citrus Essential Oils?
Yes, you can use allergy-safe substitutes instead of citrus essential oils, such as floral alternatives and seed oils. Choose milder options like chamomile or calendula, and seed oils such as sweet almond, and always perform a patch test and dilute for sensitive skin.
Do Essential Oils Affect Soap Color or Appearance?
Yes, certain essential oils can affect soap color. Citrus oils may oxidize and discolor soap, while others fade or shift hue with exposure to light, heat, or air. Monitor oxidation and discoloration to maintain consistency.
Is It Safe to Blend More Than Three Essential Oils?
Blending more than three essential oils is not generally safe or advised for most skin types. If you choose to blend, consider the interactions (synergy and dilution) carefully, test a small amount on patch skin, and start with three oils at most to help prevent irritation and adverse results.
Can Essential Oils Interfere With Soap Drying or Hardening?
Yes, essential oils can affect drying and hardening. They may slow saponification and extend trace, especially in thick batters. You may notice longer setting times, uneven hardness, or oil separation if you overload with oils.
Is Melt-And-Pour Base Acceptable for These Recipes?
Yes, melt-and-pour bases are beginner-friendly for these recipes because you can customize them easily. Note that glycerin opacity may vary; use transparent bases for clearer bars, or opaque bases for pastel textures that suit your skin.
Conclusion
You’re ready to turn simple soap into a soothing ritual you can share. With careful temperature control, you avoid harsh heat and lock in scents for months. Start small, patch test, and note every batch in your log so mistakes become lessons. Choose gentle oils like lavender or citrus to calm nerves or refresh skin, then pour slowly and store wisely. Soon you’ll enjoy hobby nights that smell wonderful and feel totally doable anywhere.

